- Manage DNS
Management

- Manage DNS
- Bulk updates
- Search DNS zones
- Purchase DNS Plan
- Manage Netmon
Management
- Manage Netmon
- Purchase Netmon Plan
- Domains
Management
- Manage Domains
- Bulk Updates
Domain registration
- Domain Pricing
- Support
Getting support
- Help Desk
- Support Utilities
- System Status
- Okta Configuration Guide
- FAQ
Okta sign in Configuration Guide
CloudFloorDNS is a DNS and Domain name portfolio platform for SMB and Enterprise businesses. All CloudFloorDNS users have the ability to configure a default Identity Provider to power Single Sign On (SSO). This article details how to configure Okta as the primary Identity Provider to facilitate SSO with the CloudFloorDNS application.
Service Provider (SP)-Initiated Authentication (SSO) Flow - This authentication flow occurs when the user attempts to log in to the application from CloudFloorDNS.
Identity Provider (IDP)-Initiated Authentication (SSO) Flow - This authentication flow occurs when the user attempts to log in to CloudFloorDNS from Okta.
SSO Integration on CloudFloorDNS platform.
In order to proceed with configuring login with SSO through Okta, you must:
Have access to an Okta tenant.
Be an Okta administrator to that tenant.
Be a registered user on CloudFloorDNS platform.
The following documents the configurations for setting up the OIDC integration between CloudFloorDNS and Okta. Okta is the Identity Provider (IDP) and depending on the use case, the user will be redirected to Okta for authentication if no session has been established.
To configure your provisioning settings for CloudFloorDNS in Okta, there are three main steps to follow:
Step One - Add the CloudFloorDNS App to Okta
Login to your organization’s Okta as Admin.
Navigate to Applications > Applications > Browse App Catalog search for CloudFloorDNS, and then click on the Add Integration button.
Enter an Application Label in General Settings. This label displays under the app on your home page.
Click on Done button.
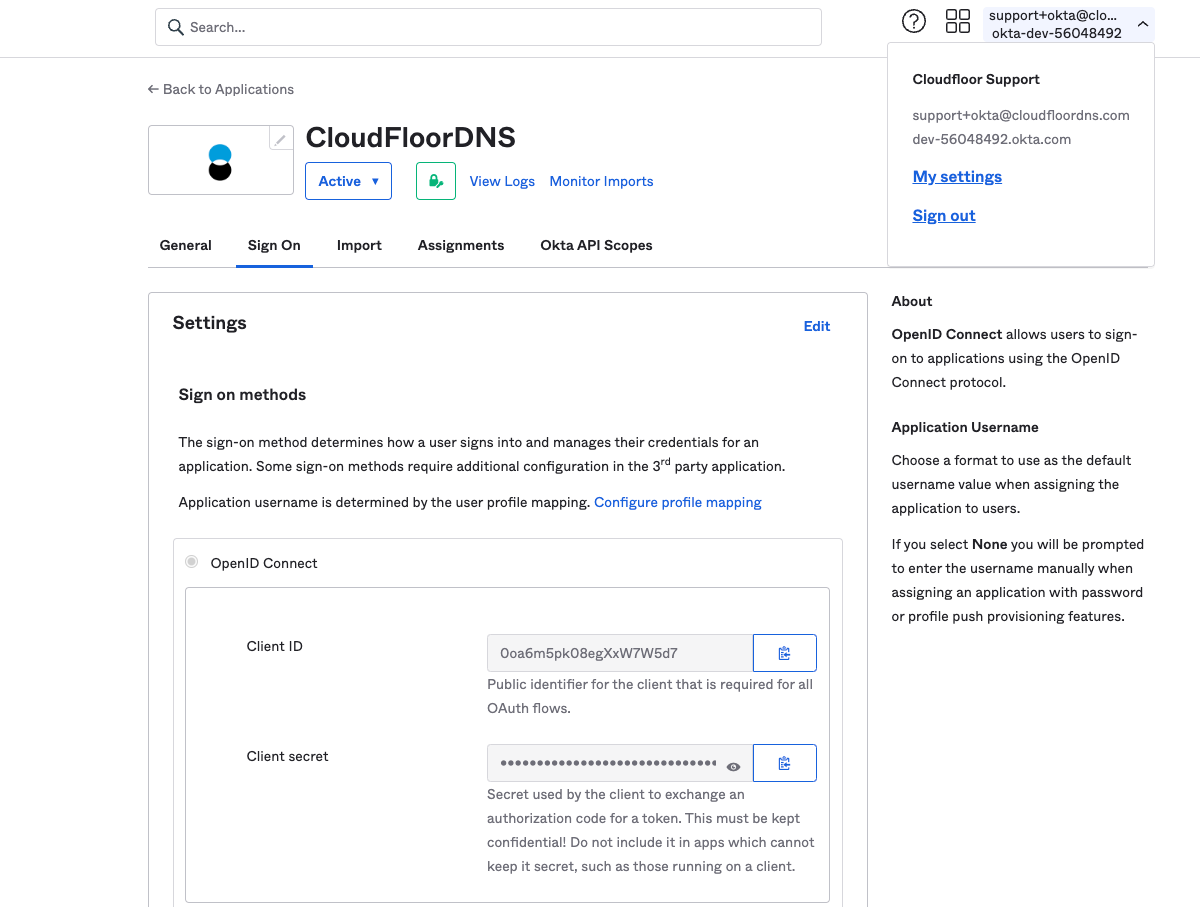
After integration CloudFloorDNS will display on the Application section. Click on the CloudFloorDNS app and navigate to the Sign On tab, copy the Client ID and Client Secret. also, you can find your organization Okta domain in your profile.
Note: These values allow CloudFloorDNS to communicate with Okta. The Client ID is a public identifier for the client that is required for all OAuth/OIDC flows. The Client Secret is a private identifier which you should not share or broadly distribute.
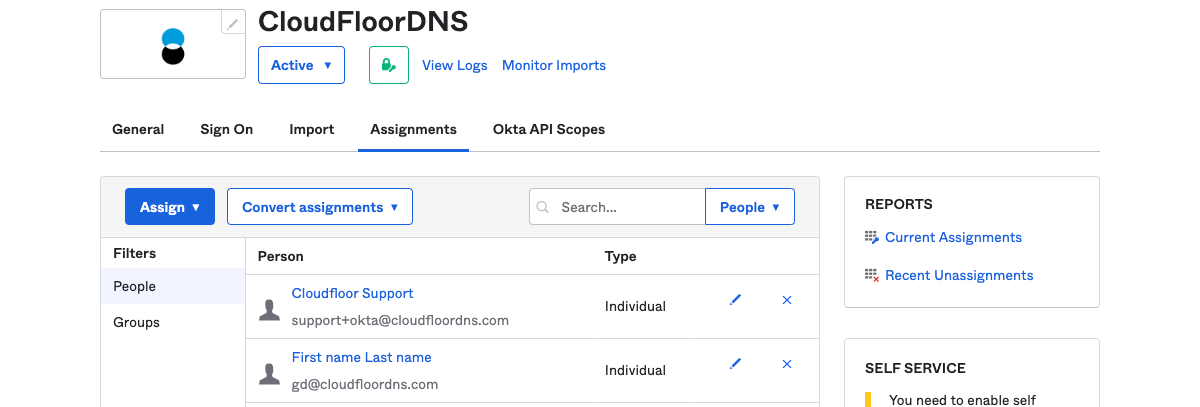
Before leaving Okta, ensure you have given yourself and any other target users access to the CloudFloorDNS application. You can do this by going to Applications > CloudFloorDNS > Assignment and then assigning to either the target people or group.
`
Step Two – Enable SSO Okta Integration with CloudFloorDNS platform.
Login to CloudFloorDNS platform using your credential.
Navigate to My Account and click on the Enable Okta Login link.
-
In the first Section add your Client ID, Client Secret, and Issuer URL which you copy from the Okta account and click on the enable checkbox to activate Okta integration.
-
Click on Save button to store Okta details, after this step Okta integration is enabled for your account.

- Add Okta users(Sub User) for your account on CloudFloorDNS platform.
CloudFloorDNS platform allows account owner/admin to add sub users to manage their domains by adding users and enable Okta login for them.
Navigate to My Account and click on the Enable Okta Login link.
-
Click on Add Okta User button for adding new sub users on CloudFloorDNS platform.

-
You can import multiple users by uploading a csv file, or add single user by using add user form.
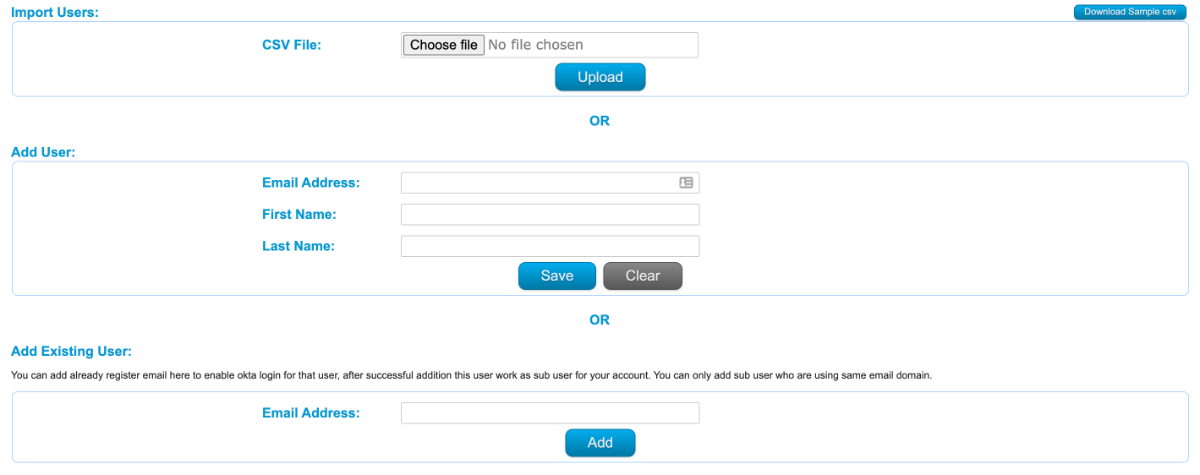
While adding users make sure that users are already added on Okta side and use the same email for adding on CloudFloorDNS platform.
After adding a sub user, sub users can login to CloudFloorDNS platform by using Okta login.
Step Three - Okta sign-in can be used both from the CloudFloorDns Login page and Okta account.
Click on the login button on CloudFloorDns platform.
-
Add your registered username/email and click on Log In button.

-
If your email registered for Okta login, you can see the Login with Okta button.

-
Click on Login with Okta button and it will initiate the SP flow.
Login to your Okta organization account with your Okta credentials.
-
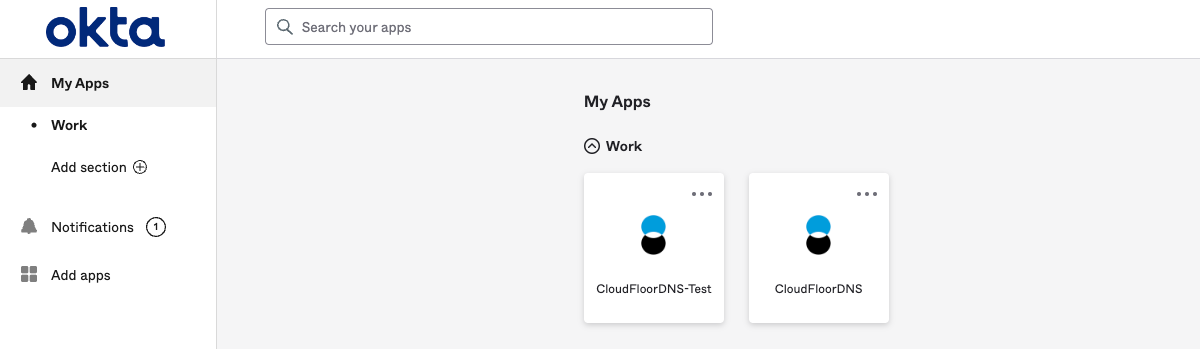
Navigate to My Apps >> Work and click on the CloudFloorDNS App.
If you experience any issues or have any questions, please reach out to support@cloudfloordns.com to engage our support staff.